Adding an Auto Notify Contact
To add an Auto Notify contact:
-
Click on the Sites tab of the main navigation bar at the top of your DataSource screen. Then select Contacts in the sub-navigation.

-
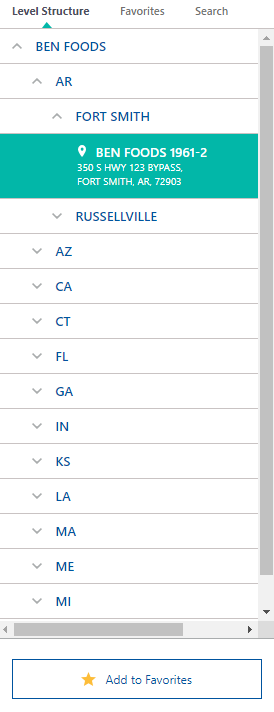
From the Level Structure portlet on the left, select the site for which you wish to update Auto Notify.
-
In the area of the screen titled Site Contacts, click on the Email Contacts tab.

-
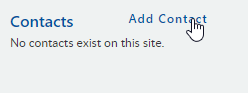
Press the Add Contact link.
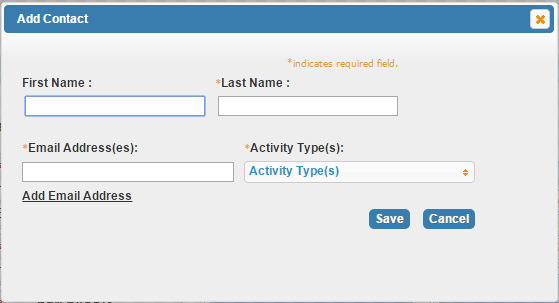
The Add Contact dialog will appear:
-
Enter the following information in the appropriate fields:
-
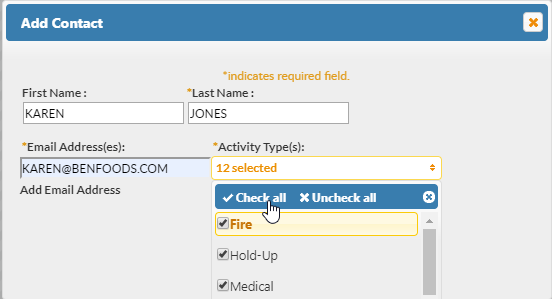
First Name: Contact’s first name
-
Last Name: Contact’s last name
-
Email Address: An email address must have at least one period (.) and one “at” (@) sign in it.
-
Activity Types: Alarm activities upon which email notifications will be sent
-
-
Click Save
The contact name will appear in the Contacts pane to the left and the contact email addresses will now appear under each applicable notification in the Email Notifications area of the screen.

-
To save updates to the Email Contacts and Email Notifications, click the Submit Changes button.
You will see the following confirmation message:
